1.20.2013

Review and Demo: imPRESS Press-on Manicure by Broadway ♥

Hey Everyone!!

imPress Nails

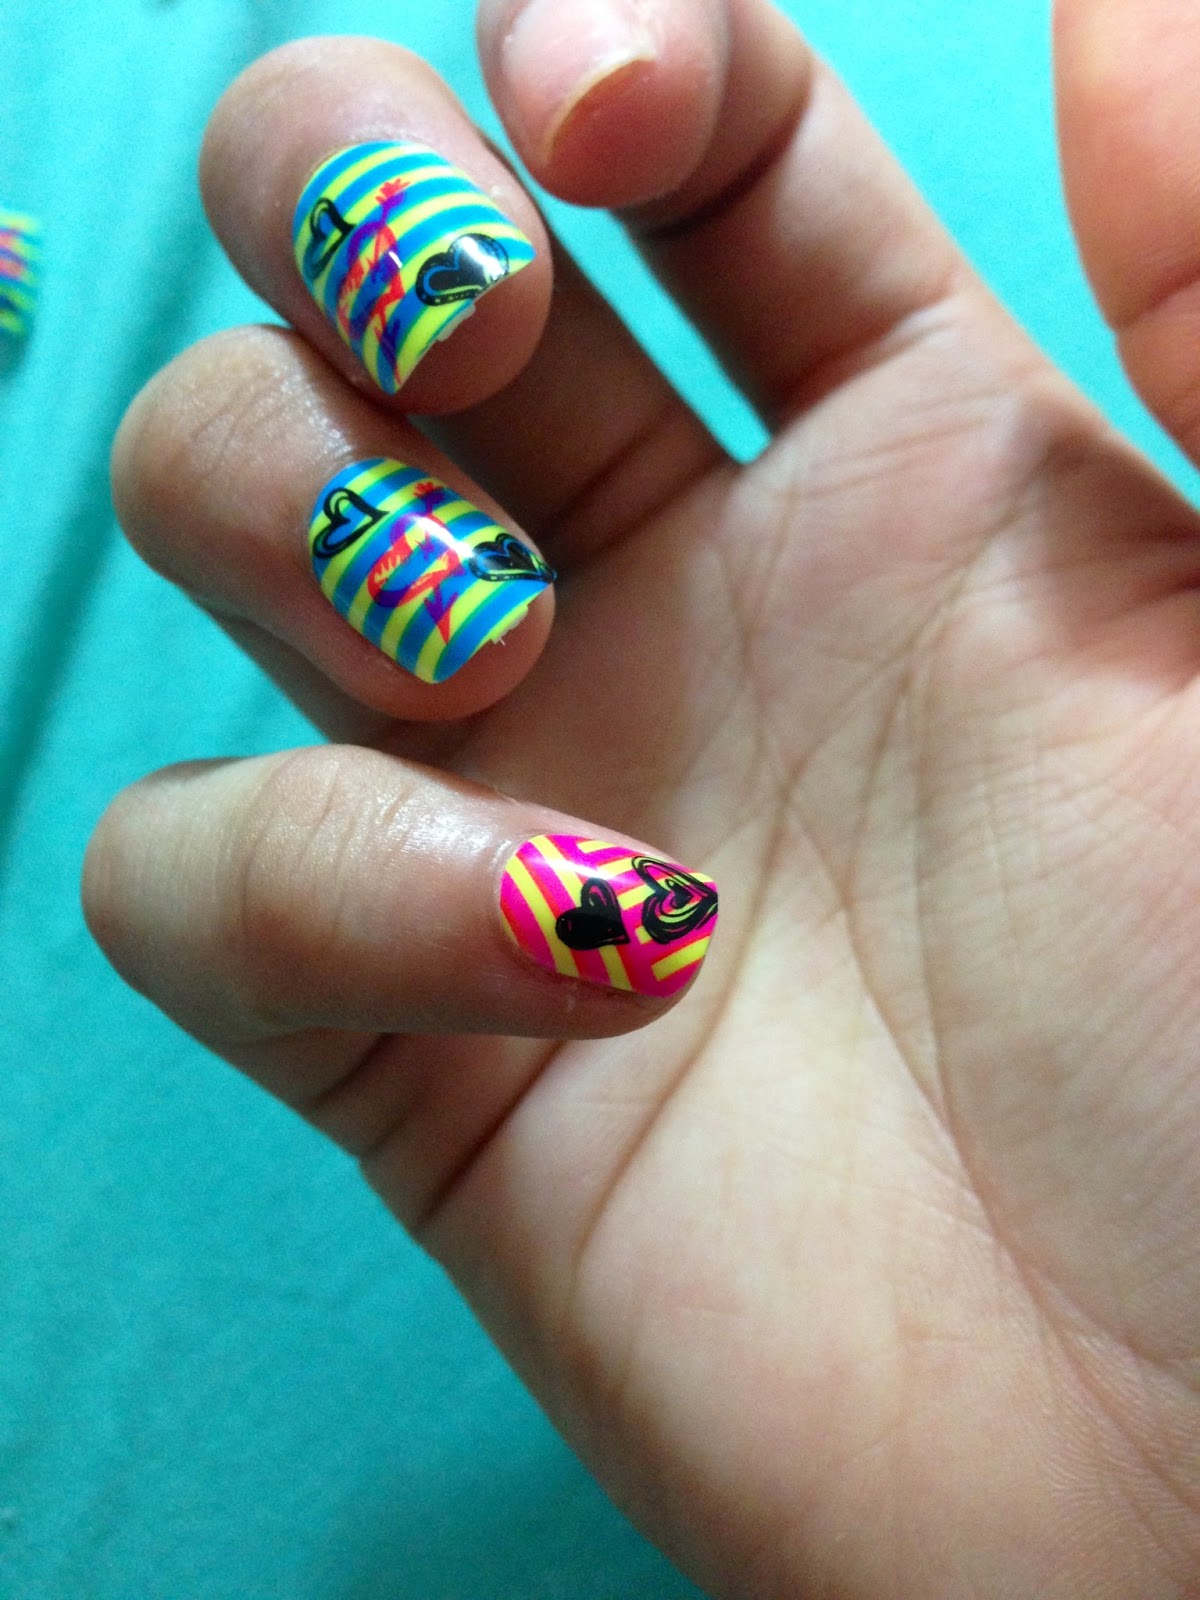
Today I’m just going to be showing you how to apply the imPRESS Press-on Manicure by Broadway as well as giving you my thoughts on them. I picked up my imPRESS nails at WalMart for $9.99CAD per set. 

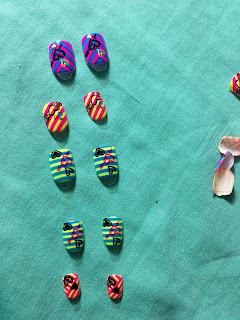
Here are the three designs I ended up getting:


Dancing Queen
Lovestruck
Vamp It Up

Packaging:
  • Really nice packaging.
  • Come in a cute see-through plastic container that looks like a nailpolish bottle.
  • The lid screws off and the actual container opens in half.
  • Comes with 24 different nails which is A LOT more nails than you would need.
    • This ensures that you will most probably find a proper fit for each nail.
  • The pack also comes with a mini nail-file and a "prep pad".
  • I did notice that a lot of the top edges of the nails were ragged and needed to be filed down. 
    • The mini nail-file that was included was perfect for this purpose.

How to apply:

  •  Find the correct fitting nail for each finger.


  • Lay out 10 nails in finger order.

  • Remove all nailpolish and cleanse each natural nail with prep pad. 
    • I'm pretty sure the prep pad is just rubbing alcohol.

  • Apply the imPRESS nails.
    • Start from the pinky and work your way to the thumb.
    • Apply each nail one by one making sure to also apply pressure for about one minute.


Application:
  • Overall the nails were super easy to apply.
  • It took less than 20 minutes to completely finish doing my nails.
  • The nails feel comfortable because they aren’t too long.


Time imPRESS nails
were applied

January 15, 2013
  • I finished applying these imPRESS nails at exactly 5:02PM.
  • I went shopping.
  • After shopping I went to a movie at around 7:30PM.
  • Once the movie was over I drove home and did a little homework.
  • Then I went to bed.
  • My nails were still going strong.

January 16, 2013
  • The next day I got ready and went to school.
  • Around 12:45PM I noticed my nails were starting to lift a little.
imPRESS Nail Lifting 
  • Once I got home from school I took a shower.
  • I watched a little TV and did some homework.
  • At 8:50 PM I noticed that one of the imPRESS nails were missing! 
    • I just decided to take the rest of them off and paint my nails.

Overall I’m very dissatisfied with the imPRESS Press-on Manicure by Broadway! They’re supposed to last up to a week but they lasted less than 16 hours for me. It would have been understandable if I was doing active things but I wasn’t. Throughout the day I also made sure not to put any unnecessary stress on the nails so there’s really no excuse for them to fall off so fast. If I hadn’t thrown out the receipt I would have returned the other two packages I purchased and i RARELY return stuff (not that there's anything wrong with returning things :P). I do not recommend these nails at all!

Stay Fab!!
xoxo
naheeda 


1.17.2013

Review: Drying Drops by Nicole by OPI ♥


Hey everyone!!


Today I’m going to be reviewing a miracle product I’ve been loving ever since I bought it, the Nicole by OPI Drying Drops. I used to hate doing my nails at home because I’m just too impatient to wait 30 minutes to an hour for them to dry. About a year ago I was strolling through Shoppers Drug Mart’s nail polish section when I saw this product. I picked it up on a whim AND IM SOOOOO HAPPY I DID. At Shoppers Drugmart 
the Nicole by OPI Drying Drops retail for about $10.99 CAD but I’m certain you can find it for cheaper at department stores.

So here’s how it works: you paint a base coat on, then your nail polish, followed by your top coat and lastly the drying drops.

What I Liked About the Nicole by OPI Drying Drops:
  • These drops claim to have your nails dry to the touch within 1 minute and completely dry in 5 minutes.
    • I kid you not after squeezing 1-3 drops of this stuff onto your nails once you’ve painted them they will usually be COMPLETELY dry within 5 minutes.
  • The product itself comes in a clear bottle with a dropper lid.
    • I love the fact that you can see exactly how much product is left and the dropper lid makes it super easy to control how much you're using.
  • Has an oily texture.
    • As well as drying my nails it also kinda moisturizes around your nail bed.
    • This is a HUGE plus for me because nailpolish remover always makes my cuticles really dry.
  • Just like the Drip Dry Drops from OPI
    • It’s a cheaper alternative to the Drip Dry Drops and they’re made by the same company.
    • I can’t even tell one difference between the two products
  • These drops have eliminated all the blowing and the waving and I never have to repaint them because of accidentally smudging them anymore.
  • Double it up with a quick-dry top coat like Seche Vite (<- click for review) and it dries EVEN faster!

What I Didn’t Like About the Nicole by OPI Drying Drops:
  • You have to be careful not to get the oil on anything.
    • ***I have never had a problem with it staining anything though!! Never hurts to be careful I guess. 


Front of Package
Back of Package


Overall i love the Nicole by OPI Drying Drops. I honestly don’t know why I didn’t find them earlier. I HIGHLY HIGHLY HIGHLY recommend them.

Stay Fabulous!!
xoxo
naheeda ♥


1.13.2013

Do It Yourself: Studded Phone Case ♥

Hey everyone,

Studded iPhone case


So I don’t know if you guys have noticed but lately studs have been EVERYWHERE and frankly I love them! I’ve seen them on everything from bracelets to scarves to shorts to tops to jackets to leggings to hats to boots to shoes to bags to sunglasses and literally anything else you can think of. If you haven’t already joined this fabulous and edgy trend I have the perfect DIY for you today, a studded phone case. This awesome project gives you a way to take a plain phone case to the next level without spending too much.


Phone Case and Gold Studs
from eBay

So here’s what you’ll need:

  • A phone case (preferably silicon)
  • 1 cm by 1cm studs 
  • Super glue (optional) 

I bought the plain silicon phone case and the pyramid shaped studs on eBay. The case was only $1.23CAD (including shipping) and the studs were $1.75CAD (including shipping). 


1. Get an idea of the pattern you want
  • sketch out or loosely place the studs in the shape you want. 
Outline


2. Secure the studs


  • I started from the bottom of the design and worked my way up.
  • Because I was using a silicone case I had to press the studs into the case and fold over the prongs one by one.
    • If you don’t like the way a stud looks when you fold over the prongs simply unfold the prongs and reattach the stud.


  • If you are using a hard phone case fold over the prongs first and then take the superglue and glue them on one by one.
    • Be very careful of where you are placing the studs because superglue is permanent. Even if you can remove the stud there will be glue residue remaining on the phone case.


3. Complete the design
  • Continue to attach the studs until your design is complete!


4. If you are using a silicon case make sure to cut a piece of paper to put inside the phone case before slipping your phone it.
  • This will prevent the prongs from scratching the back of your phone. Because I put a back cover on my phone I didn't have do this last step.

(the back of my phone has a back cover, that's why there are random bubbles lol)

And there you have a super cute and fashion friendly phone case. I hope you guys try this easy and inexpensive DIY!

As always Stay Fabulous!!
xoxo
naheeda


1.11.2013

10 Beauty Resolutions for the New Year ♥


Hey everyone!

Bye Bye [Bye *insert N’Sync flashback* lol] 2012 and HELLO 2013! I hope everyone’s having a great New Year so far because I sure am :). 
Today I’m going to be sharing my ten New Year’s BEAUTY Resolutions. I hope my easy and achievable list inspires all you gorgeous girls out there to also pay yourself some extra TLC.

So without further-ado here here we go:

Number 10: STOP BITTING MY NAILS
This is something that pretty much more than half the world needs to work on. Nail biting is one of those annoying habits that happen without you even knowing. Did you know that you could get worms from biting your nails! I know GROSS!

Until I kick this bad habit to the curb I’m going to paint my nails bright colours every week. This way I can constantly remind myself not to nibble away at them.

Number 9: BUY LESS BEAUTY PRODUCTS
I swear I tell myself this every time I leave a mall LOL. To stop myself from giving in the next time I enter a Sephora I’m going to go through all my makeup. Going through all your makeup at least once a year helps you know what you have to use before going out and get anything new. *fingers crossed*

Number 8: SPF SPF SPF!
SPF is soo important in the summer and even in the winter. I can’t stress how delicate our skin is against sun rays. SPF protects us from skin cancer, sunburn, wrinkling and premature aging. Sure you may have a better tan now but you’re going to end up looking 10 years older than you are pretty soon.

This year I plan on SPF’ing it up by only purchasing moisturizers with SPF. [I swear I said “SPF” like 100 times in a matter of those last few sentences lol]

Number 7: COMPLETE A BEAUTY DARE
What’s a beauty dare you may ask? A beauty dare is when you step outside of your comfort zone and wear something you normally wouldn’t. For example bold lips or a funky pattern. Personally I NEVER switch it up, so this is actually going to be a challenge for me.
*remember not to go too far, always wear what you’re comfortable with

Number 6: CLEAN MY MAKEUP BRUSHES MORE OFTEN
I have never been bad with this but there’s always room for improvement. Dirty brushes and other products can harbour dirt and bacteria you don’t want to be putting on your face. This will prevent breakouts and it’ll be easier to apply product with nice and clean brushes. You can also clean eyeliners and lipliners by simply sharpening them.

Number 5: BRUSH MY HAIR
This may sound crazy but brushing my hair is really something I have to work on. I have curly hair, so brushing it is actually kinda hard work. It takes time and it always leaves it frizzy and semi-afro-ish.

This year I’m definitely going to brush it out every day and apply a little bit of Moroccan Oil. Applying a tiny bit of the Moroccan Oil will eliminate the frizz and hopefully rejuvenate my hair without leaving it greasy and chemical filled.  

Number 4: WASH OFF MY MAKEUP
This is a big one for me. Some nights I come home already half asleep and jump right into bed.

This year I’m going to make sure to wash my makeup off every night to keep my face clean and let my skin breath. 

Number 3: KEEP ONTOP OF MY SKINCARE GAME
Skin-care is super important for everyone! This year I’m absolutely-positively going to follow a proper skin care routine. Every day when I wake up and before going to bed I’m going to make sure to:
  • Cleanse
  • Tone
  • Moisturize
  • Exfoliate 1-2 times a week


Remember healthy skin is happy skin.

Number 2: GET MY BEAUTY SLEEP
When you sleep your body does a lot more than just rest. The hours you spend dozing are when your skin works to regenerate and repair your skin cells. Lack of sleep can speed up the aging process and increase the rate of health issues.

This year I’m going to try to get 6-8 hours of rest every day. 

Number 1: EAT HEALTHIER FOOD
This is my biggest vice. I LOVE JUNKFOOD… but unfortunately my body doesn’t.

This year I’m going to try my hardest to keep track of my calorie intake and not eat fast food often. It may be hard to say no to Ronald McDonald’s tempting ways but with a little determination and persistence it’ll be a piece of cake [yes pun intended LOL]


Hope you guys have a wonderful year and never forget to Stay Fabulous!
xoxo
naheedz


12.11.2012

Review and Swatches: Too Faced “The Return of Sexy” Palette ♥


Hey everyone!!


Today I’m going to be reviewing the Too Faced “The Return of Sexy” palette.  There is somewhat of controversy around this palette but I personally love it. Some people think it fades easily and it all blends together throughout the day but I don’t agree AT ALL. You can get it at Sephora stores for $54 CAD (+tax).

  • Unlike some palettes the Too Faced “The Return of Sexy” palette is super sturdy. 
  • It’s made out of black plastic and once you pick it up you can immediately feel the quality because of its weight. 
  • It’s not too big or too small, which makes it the ideal size for travelling.


  • Once you open the palette, the top section is a huge mirror that can easily be used to complete an eye look. 
  • Behind the mirror are three cards for the three different colour schemes in the palette. 
  • For each scheme they have a day time and a night time look, which I thought can be super helpful for beginners to makeup.


  • Now for the fun part! The inside bottom part of the palette is where the eyeshadows are. 
  • Like I mentioned before, there are three different sections of eyeshadows based on their colour scheme. 
  • Each scheme has a combination of five different cool and warm colours. 
  • There is a neutral section called “The IngĂ©nue”, a purple section called “The Icon” and a super smoky section called “The Bombshell” –which one are you lol-.
  • The eyeshadows themselves aren’t like other Too Faced eyeshadows. 
  • They aren’t as velvety or buttery. 
  • Although you can noticeably see that the formula is different the quality however is still amazing. They are super pigmented and last really long. 
  • When you apply them they may feel a little dry but I haven’t noticed any falling or blending.


  • The palette also comes with a baby Too Faced “Shadow Insurance” (which I personally prefer to the Urban Decay “Primer Potion”) and a Too Faced “Perfect Eyes Waterproof Eyeliner”. 
    • Can I just take a minute to rant about the amazingness of this eyeliner! 
    • Its honestly one of the creamiest eyeliners on the market AND its actually waterproof! Texture-wise it’s exactly like the Urban Decay “24/7 Glide on Eye Pencil” and staying-wise it’s like the Makeup Forever “Aqua Eyes” without the tugging!
    • The more and more i use it the more its becoming one of my favourite eyeliners!

SWATCHES:


Overall I would definitely recommend the Too Faced “The Return of Sexy” to anyone who is looking for a great Fall/Nighttime palette!

Stay Fabulous!!
xoxo
naheeda 


11.27.2012

Review and Swatches: Laura Mercier HydraTint Lip Balms ♥


Hey everyone!

Today I’m going to be reviewing the Laura Mercier HydraTint Lip Balms. I got them in the colours: “Rose Tint”, “Berry Tint” and “Crimson Tint”. They are 1.2 oz and retail for about $23 each at Sephora.


Here's what I like about the Laura Mercier HydraTint Lip Balms:


  • Unlike most lip colours with SPF that I've used these are not at all on the dry side
  • They are extreamly moisturizing
  • Colour is very buildable
  • Not sticky or thick
  • Good variety of shades for all times of the year
  • No waxy feeling some
  • Never gets on your teeth
  • Can be layered on top of lipsticks to add a moisturizing shine
  • Stays on for a pretty good amount of time
  • Gives a nice healthy blush of colour to your lips
  • Not too shiny


Here's what I don’t like about the Laura Mercier HydraTint Lip Balms:
  • Super expensive
  • Has a VERY light plastic smell (not that big of a deal, well to me at least)

SWATCHES:


Laura Mercier HydraTint Lip Balm Swatches


Colours on Lips (built up):

Laura Mercier HydraTint Lip Balm in "Rose Tint"

Laura Mercier HydraTint Lip Balm in "Berry Tint"

Laura Mercier HydraTint Lip Balm in "Crimson Tint"


Every time winter rolls around my lips start chapping like crazy. And around September/ November I go crazy experimenting with different chap sticks. I just recently came across these bad-boys and I love them. I totally recommend them!

Stay Fabulous!!
xoxo
naheedz


11.19.2012

Review: The Beauty Blender ♥

Hey everyone!


After reading the endless blogs and reviews, I gave in and purchased the Beauty Blender sponge at Sephora for $26CAD +tax. I know $30-ish for a sponge…crazy. At first I was super doubtful about buying the Beauty Blender because I’ve used a knock off before and it was a disappointment. I AM SO HAPPY I GAVE IN AND BOUGHT AN ACTUAL BEAUTY BLENDER.

I LOVE the Beauty Blender! First of all the shape is awesome! The round side is great for applying product all over your face and the pointed top allows you to get into small corners like beside your nose or under your eyes.  It is large enough to hold and yet small enough to work the product into your face well. The texture is also perfect for foundation. It leaves your face looking flawless and airbrushed. I got this and never looked back (I literally have no use for my Sigma F80 anymore). The Beauty Blender is my everyday/go-to foundation applicator. Recently I tried using it with my concealer. I have to say for concealer it’s not my ideal tool, but at the same time it doesn’t do a bad job either.

So how do you use it? Basically you take the sponge and run it under water. Once the sponge is completely wet, squeeze it out, leaving it damp. Use the damp sponge to stipple or dab the foundation on your face.

Foundation Application with Beauty Blender

Don't waste your money on the dupes like I did because the Beauty Blender is the real deal and everyone needs one!  


stay fabulous!!
xoxo
naheeda 

10.08.2012

Review: L’absolu Rouge “La Base” from LancĂ´me ♥


Hey everyone!!


So today I’m going to be review the L’absolu Rouge “La Base” by LancĂ´me. It is a revitalizing and highlighting lip treatment that contains Pro-xylane and SPF 10 sunscreen. You can get your own at Sephora or at any LancĂ´me counter for $35+tax.

What I liked about the L’absolu Rouge “La Base”:
  • It’s an ALL in one product.
    • Its lip balm, sunscreen and an anti-aging product.
  • Prevents lip wrinkles because it contains Pro-xylane.
  • Helps your lipstick glide on smoothly when applied on top of the L’absolu Rouge “La Base”.
  • Leaves your lips noticeably softer.
    • Really nourishes your lips.
  • Gives a cute shine to your lips.
    • Contains a very subtle amount of glitter (not very notable AT ALL).
  • Classy packaging for a lip balm. 
  • No other brands lip balm even compares to the results you get with the L’absolu Rouge “La Base”.


*can’t decide if this is a pro or a con*:
  • Pretty expensive... but totally worth the price.
    • You really get huge positive results.


What I didn’t like about the L’absolu Rouge “La Base”:
  • Terrible to use as a base
    • Lip products applied over the L’absolu Rouge “La Base” fade quickly.
  • Smells and tastes like roses.
    • Some people may like this but I HATE it. The taste is so strong it literally feels like your constantly biting a rose.
    • If you avoid licking your lips you should be fine.


Lips with L'absolu Rouge "La Base"
by LancĂ´me 

Give your lips the same treatment as your face and try out the L’absolu Rouge “La Base” from LancĂ´me.

Stay Fabulous!!
xoxo
naheeda ♥


10.06.2012

Review: Anastasia "Brow Wiz" ♥


Hey everyone!

"Brow Wiz" by Anastasia


So you have all heard the term “eyes are the windows to one’s soul”, well let me tell you that the windows to your eyes are your eyebrows! Today I’m going to be reviewing an amazing eyebrow pencil called the “Brow Wiz” by Anastasia. Don’t resort to butchering your eyebrows when you can use this handy tool and achieve beautiful looking brows.

Out of all the products I own for my brows the Anastasia “Brow Wiz” is my go-to product. You can buy the Anastasia “Brow Wiz” at Sephora for $26+tax.

The “Brow Wiz” is super easy to work with and it leaves my eyebrows looking extremely natural. The product itself is small enough in diameter allowing me to mimic hair-like strokes really easily. Unlike other eyebrow pencils that literally make you tug your forehead to get colour payoff, the “Brow Wiz” is the perfect consistency.

The attached spoolie on the back of the pencil is really convenient. It’s the perfect size for blending out the harsh strokes without being too big and smudging the product outside of the brow area and onto the skin.
As far as longevity goes, this product last ALL day!  I never use a brow gel to set my brows and this look the same at the end of the day as it did in the beginning.

The lady at Sephora recommended the shade “brunette” for me which I personally think is too dark. I’m just using it until it finishes (which is taking FOREVER, seriously this stuff is a bottomless pit) so I can purchase it in the shade “medium ash”.

Before: Natural Eyebrows
After: Anastasia Brow Wiz in "Brunette"
and Urban Decay "Foxy" eyeshadow as a brow-bone highligh

If you pluck your brows try letting them grow out a bit and fill them in to see how you like it. For about two years now thick brows have been the way to go. Tweet me pictures and your thoughts on this trend (@naheedzzz)

Stay Fabuuloous!!
xoxo
naheeda♥


9.11.2012

Nails Of The Day: "She's Picture Perfect" by Essie ♥

Hey Everyone!!

This is just a quick review on my current nails.
Because fall came way faster than I expected I’m trying to squeeze in as many ‘summer’ polishes as possible. So today I’m wearing Essie’s “She’s Picture Perfect”, which part of Essie’s resort collection. It’s a nice lavender shade with a very subtle iridescence of fuchsia glitter in it. 


What I like about Essie’s “She’s Picture Perfect”:
  • Like the finish
    • Dries really shiny
    • Dries smooth
  • Awesome pigmentation
    • Only need two coats for it to be opaque
  • I feel like it would look great on any skin tone
    • It’s a pleasant colour that really makes your hand look nice
  • Definitely perfect for spring and summer


What I didn’t like about Essie’s “She’s Picture Perfect”:
  • Have to let each coat dry before applying the next so it doesn’t drag.
  • Took 13 minutes for my nailpolish to completely dry


Stay Fab!!
xoxo
naheeda ♥


9.06.2012

Nails Of The Day: “Master Plan” and "Nothing Else Metals" by Essie ♥


Hey everyone!

Lately I have been trying to keep my spending on a lowdownand it was going pretty well... UNTIL I walked into my local Shoppers Drugmart.I just couldn’t resist. It was literally a “i really can't stay”… “but babyit's cold outside” moment as I entered the nailpolish aisle. Long story short, Iforced myself to leave after I had picked up two new polishes in the fiveminutes I was in the aisle to “just see” [lies I tell myself lol]. The twocolours I picked up are Essie’s “Master Plan” and “Nothing Else Metals”.


“Master Plan” is a GORGEOUS greyish/taupe colour, which to me is the best grey colour outthere. It’s chic and sophisticated but doesn’t make your hands look like theybelong to a corpse. Out of all Essie nailpolishes I have to say this one is theeasiest colour to apply. Two coats of this stuff and your nails look professionallydone. It’s very creamy and it dries smooth in literally less than five minutes!I’m honestly surprised that I didn’t already have this colour, it’s just thatbeautiful.

“Nothing Else Metals” is a newer Essie colour part of theMirror Metals collection. “Nothing Else Metals” is a shiny lavender colour thatpairs perfectly with “Master Plan”. This colour also dries extremely fast and neat.At first when I applied the colour I noticed some brush strokes but as I put onthe second coat the lines just disappeared. As to why this colour is part ofthe Mirror Metals collection or even named “Nothing Else Metals” for thatmatter, I have no idea. I don’t recall the last time I saw a purple metal, justsaying. Poor naming aside, it is however a stunning colour.

Overall I’m really happy with both these colours. Just as I wasstarting to lose hope in Essie nailpolishes these two colours won me back.
#TeamEssie? lol

Stay Fabulous!
xoxo
naheeda ♥


8.27.2012

Review and Swatches: “Shimmer Cubes Palette 24" from The Body Shop ♥

Hey everyone!

I know long time no see. Just took a break to enjoy my summer, sorry not sorry! Anyways I'm back :)


Today I'm going to be review a “Shimmer Cubes Palette” in number 24 from The Body Shop. Everyone knows that The Body Shop sells amazing creams, so the reason I bought this palette is because I really wanted to try out and see the quality of the makeup products.

When I went to The Body Shop I was really surprised to see that the makeup was pretty expensive.  Also the fact that The Body Shop I went to was located right in front of a Sephora made it really hard for me to pay $24.86CAD for the “Shimmer Cubes Palette 24”. Nevertheless I just went on a whim and ended up buying it. When I got home obviously I had to try it out and I was really pleasantly surprised. I’m really happy with the smooth and silky texture of this palette.

The packaging of this palette is really unique. Inside the plastic container the eyeshadows are divided into their own individual containers that also have lids. At first I thought this was kind of strange but then I realized that this is actually clever packaging. This way the eyeshadows don’t mix into each other and in case the palette falls there’s extra protection. If you own many of these Shimmer Cubes Palettes you can also mix and match the colours and take them with you. 

Shadows Inside Overall Container With Lids

Shadows Outside Overall Container

Looking at the palette you would think you don’t get a lot of product but you actually do. Each individual shadow is 3.5g (which is more than 2 times the product you will get if you buy a MAC eyeshadow). You REALLY do get a lot of bang for your buck. Like I mentioned before the quality of the eyeshadows are amazing! They are smooth and silky. You don’t get a lot of fallout and they last the whole day. If you are at a Body Shop I would definitely recommend you pick one of these palettes up. The Bod Shop usually has promotions and coupons going around so you can probably get this palette for much cheaper.

SWATCHES:


Love You Guys! Thanks For ALL The Support 
Stay Fabulous!!
xoxo
naheeda